Over-Engineering a Website (September 2022)
I've spent way too much of the last 2 years tweaking this website and now, after a friend built his website in 2 weeks and published the obligatory "How I built my website" post, I'm finally documenting all the crimes I've committed while making this website. The repo for this website is public so you can poke around and witness the horrors first hand.
The Stack 🥞
The main technological pillars of this website are:
...aka the TMNT stack!!1!1!!
On a slightly more serious note, I'll talk about most of the important tech
used in this website in the rest of the article below, but if you want a TL;DR
you can look through the
package.json.
The Code
The vast majority of this website is written in TypeScript since it provides a significant quality of life boost for a minor initial investment. If only the stocks I invest in had a similar ROI.
React is my framework library of choice with Next.js. This combo is extremely
okay for my use-case (a mostly static site) thought I didn't know this when I
started. The main reasons I chose the pair are:
- They were the first I learned.
- Next.js SSR / SSG was easier to understand and hack around than Gatsby's graphql + plugin system.
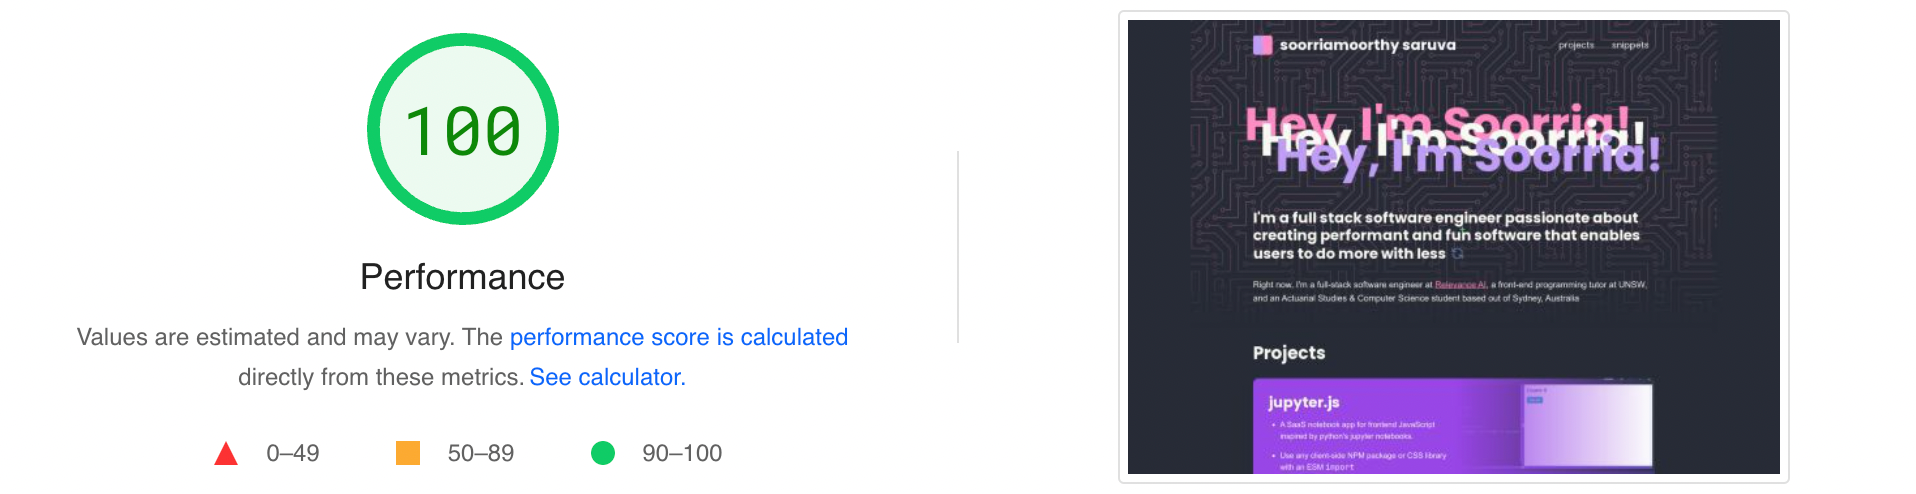
This combo also happens to be pretty okay performance-wise (though unfortunately not on the level of SolidJS, Qwik or Astro) with a 78 on mobile and a 100 on desktop with PageSpeed Insights' synthetic tests for my home page:
Now that I've used Vue.js with Nuxt, and SolidJS with Vite and SolidStart, I would probably choose to use SolidJS once SolidStart is ready and I might even switch this site over as soon as it is.
Making it Pretty
The styling for this website it mainly done with Tailwind CSS, but I've made a few simple changes to the base theme:
- Adding the Dracula theme's colours.
- Adding a
displayfont family with Poppins as the main font. - Overriding the
monofont family with JetBrains Mono as the main font.
For plugins, I've added the
@tailwindcss/typography
plugin which makes posts like this one look pretty with a single .prose.
Another plugin I use is what I like to call the Hocus
Plugin (sparkles are required). It's a plugin that's great for lazy
people like me who make their :hover and :focus states basically they same,
adding the hocus: variant which will add the associated styles on hover and
focus. It also adds hocus-within, group-hocus, and group-hocus-within
which are similar but based of slightly different existing variants.
While writing this post I decided to procrastinate and add a snippet for this plugin.
The Content
Most websites have some sort of content. On this site, the content is mainly text with some code blocks, and fewer interactive-ish demos. Additionally I want to be able to edit some things (all on the home page) without needing to re-deploy my site. To suit my needs the content for this site is written in MDX and sourced either from the git repo, or a Supabase "CMS" instance.
MDX
MDX is markdown on steroids. It lets you embed React components in your markdown, giving you way more flexibility than normal markdown. There are a few ways to use MDX with next.js:
@next/mdx- A first-party Next.js "plugin" that lets you use.mdxfiles as routes in yourpagesfolder.next-mdx-remote- A library from HashiCorp designed for, but not limited to, Next.js that compiles your MDX content server-side, and lets you render it in a React component. This is what I initially used but moved away in favour of ...mdx-bundler- A library by Kent C. Dodds that bundles your MDX content server-side and also lets you render it in a React component. This is what I use right now.
Looking at the options above, @next/mdx seems like the easiest solution, but
it's also the least flexible. On my site there are places I use MDX where the
rendered content isn't the page's main content. Take for example the home
page. The subtitle paragraph and the "now" paragraph
below it are rendered from MDX allowing me to use the <Sparkles /> component
in it AND change out what the text says without needing to re-deploy.
Now that we've discarded option 1, you might be wondering why, after building my
site with next-mdx-remote I switched to mdx-bundler. After all, both allow
you to provide custom components to use in your MDX and let you add a bunch of
plugins to modify the behaviour of your markdown and intermediate html. The
reason is the bolded and italicised word in option 3 that's also part of the
name of the library - bundling.
When next-mdx-remote compiles your MDX, it converts your MDX to JavaScript
that can run in your browser (with React), but it doesn't (and can't) deal with
anything imported from other files. While this isn't a deal-breaker for most, it
means that when you provide a custom component to your MDX in a parameterised
route, the cost of the component is incurred in every page. This is bad when
some pages have custom components like
this demo which are useless on other pages.
mdx-bundler solves this issue by a) enabling imports in your MDX text and b)
compiling and joining only the parts used in a piece of MDX into its final
output or bundle. That is, it bundles your MDX text and any of its
dependencies and tree-shakes any unused code. This results in fewer bytes sent
over the wire for each page, thus letting me build more complicated custom demos
and examples without worrying about destroying performance on other pages.
MDX Plugins
The base features of MDX might be enough for most sites - but not for one as
over-engineered as this one. All the MDX rendering libraries mentioned above
allow you to add remark and
rehype to play around with modify the
intermediate markdown and html syntax trees respectively.
Remark Plugins
These are the remark plugins I use in order:
-
remark-gfm- Adds support for GitHub Flavoured Markdown with additions likestrikethroughsand tables! -
remarkTypescriptTransform- A custom remark plugin I wrote to create a version of every TypeScript code block that is transpiled to JavaScript. It then wraps the pair of code blocks in my<TsJsSwitcher />component which handles conditionally showing the correct version of the code block. For example, it transforms TypeScript code blocks in MDX frommdx```ts ;((console as any).log as any)('Hello, World!' as any) ```to
mdx<TsJsSwitcher> ```ts ;((console as any).log as any)('Hello, World!' as any) ``` ```js console.log('Hello, World!') ``` </TsJsSwitcher>for which the markup isn't handled correctly by my syntax highlighter of choice...
-
remark-shiki-twoslash- Highlights code blocks with theshikisyntax highlighter - which uses the same underlying highlighter as VSCode! This needs to be after theremarkTypescriptTransformplugin so that both the original TypeScript and the transpiled JavaScript are highlighted, and so the TypeScript can be correctly transpiled.
The remarkTypescriptTransform and remark-shiki-twoslash plugins are only
used if the MDX text might contain code blocks. I chose to do this since the
highlighting and transform took too long for the home page (added close to 1
extra second!!), and due to how Vercel handles deployment outputs rebuilds of
the home page would fail due to missing language grammars.
Rehype Plugins
These are the rehype plugins I use in order:
-
rehype-raw- A plugin that re-parses nodes in the rehype tree as html. This is required to use theremark-shiki-twoslashplugin as it outputs as html string rather than mdast nodes, nad MDX cannot correctly interpret it. -
rehype-slug- Addsids to every heading in MDX content where the value is a slugified version of the heading text. For example the html for theRehype Pluginsheading above would be transformed fromBefore rehype-slughtml<h4>Rehype Plugins</h4>to
After rehype-slughtml<h4 id="rehype-plugins">Rehype Plugins</h4>and you can confirm this by right-clicking and
inspecting the heading. -
rehypeRearrangeShikiOutput- A custom rehype plugin that rearranges the html output ofremark-shiki-twoslashas it adds a few extra layers of html tags that aren't very easy to replace with custom MDX components. It transformsshiki's code block output fromBefore rehypeRearrangeShikiOutputhtml<pre class="shiki dracula"> <div class='language-id'>ts</div> <div class='code-container'> <code> <!-- Highlighted code lines here --> </code> </div> </pre>to
After rehypeRearrangeShikiOutputhtml<pre class="shiki dracula" language="ts"> <code> <!-- Highlighted code lines here --> </code> </pre>which is flatter and does more work at build-time to reduce work at runtime and client-side.
-
rehype-autolink-headings- Adds links to each heading so you can share links to specific parts of a page and must be used afterrehype-slug. You can see the link if you hover over any heading in this page except the one at the top - e.g. hover over theRehype Pluginsheading above and you'll see a#appear to the right and its html gets transformed fromBefore rehype-autolink-headingshtml<h4 id="rehype-plugins">Rehype Plugins</h4>to
After rehype-autolink-headingshtml<h4 id="rehype-plugins"> Rehype Plugins <a href="#rehype-plugins" tab-index="-1" aria-hidden="true"></a> </h4>which you can again confirm by right-clicking and
inspecting the heading (though in this case you will notice a slightly differenthrefdue to Next.js' Link component and notice a few classes for styling) -
rehype-accessible-emojis- Wraps emoji in a<span>with an appropriatearia-labelattribute.
"CMS" #1 - the _data Folder
As the name suggests, the
_data folder is
where the vast majority of the data / content on this site is stored. The
general structure of this folder is:
_data
└  [type]
   └  [slug]
      ├  index.mdx
└ components.js[type]is one of'blog','misc','projects'or'snippets'.[slug]is what gets used in the url for the page. Using the file system for this means that I get unique slugs for free!!index.mdxis where the MDX text and frontmatter goes.components.jsis an optional file from which the adjacentindex.mdxfile can import components specific to that page.
"CMS" #2 - Supabase
For things that I want to be able to change without re-deploying the site, I use a Supabase instance with the following schema (as SQL):
create table singletons (
  id int8 generated by default as identity primary key,
  slug text unique not null,
  context text default '',
  public boolean default true
);
I also made a secret "CMS" frontend and set up row level security rules so that only I can create, update and delete rows.
The format of the text in the content column depends on my needs:
-
For the hero on the home page I want to be able to change out the text, and previously I wanted to be able to control whether there was a hover interaction. For this, the
contentis a JSON blob. -
For the subtitle on the home page I want to have several options that are compiled as MDX and can be randomly cycled through client-side. For this, the
contentis a list of paragraphs separated by---s.
Going Live
This website is deployed to Vercel. It's probably the best place to deploy your Next.js apps - static pages are deployed to CDNs, while more dynamic ones are deploy to serverless functions and edge functions / middleware are deployed to Cloudflare Workers. Every commit is automatically built and deployed, and the CDN cache is invalidated, saving me from needing to set up complicated CI/CD pipelines and from one of the most difficult problems in programming. On top of all that, they have an extremely generous free tier.
The only downside is that Vercel's bot comments on every commit, so GitHub sends you emails but there's a very easy fix.
Random Stuff
Updating Without Re-Deploying
As I've mentioned a few times in this post, I want to be able to change aspects
of my home page without needing to wait a few minutes for a deploy. Next.js
greatly simplifies this on pages using
getStaticProps -
Next.js' API for fetching data at build-time. By providing a value for the
revalidate
property, Next.js will re-fetch data, re-generate that specific page, and
invalidate the page's CDN cache at most once every n seconds specified!
Tab Icons, Titles, Descriptions
I'm not an SEO pro, but it's nice (and useful) to be able to set the tab icon (aka favicon), title, description and other metadata for pages. Social Sharing Images, also known as "OpenGraph Images" are the images you sometimes see when you share a link on social media and they're also pretty useful to change.
These can all be set by adding the following tags, with appropriate values in
the <head> of your document:
<!-- Page Title -->
<title>
  Over-Engineering a Website (September 2022) | Blog • Soorria Saruva
</title>
<meta property="og:title" content="Cool blog post" />

<!-- Page Description -->
<meta name="description" content="Cool blog post description" />
<meta property="og:description" content="Cool blog post description" />

<!-- Page URL -->
<meta property="og:url" content="https://soorria.com/posts/cool-blog-post" />
<link rel="canonical" href="https://soorria.com/posts/cool-blog-post" />

<!-- Favicon -->
<link rel="icon" type="image/png" sizes="32x32" href="/favicon-32x32.png" />
<link rel="icon" type="image/png" sizes="16x16" href="/favicon-16x16.png" />

<!-- Sharing Image URL -->
<meta
  property="og:image"
  content="https://soorria.com/api/og?title=Over-Engineering%20a%20Website%20(September%202022)&subtitle=soorria.com%2Fblog%20"
/>

<!-- Sharing Image Dimensions -->
<meta property="og:image:width" content="1200" />
<meta property="og:image:height" content="630" />

<!-- Twitter Sharing Configuration -->
<meta name="twitter:card" content="summary_large_image" />
<meta name="twitter:site" content="@soorriously" />
<meta name="twitter:creator" content="@soorriously" />
I use the awesome next-seo package
which simplifies the process of setting and managing the tags above.
Additionally, I use
next-sitemap to create a
sitemap for this website a build-time which I think helps web crawlers.
Generating Social Sharing Images
You may have noticed that value of the content attribute for
<meta property="og:image"> tag above doesn't point to a .png, .jpg or any
other image file (at least directly) and instead points to:
https://soorria.com/api/og?title=Over-Engineering%20a%20Website%20(September%202022)&subtitle=soorria.com%2Fblog%20You'll also notice that the url seems to contain the page's title and a
subtitle - an intentional decision allowing me to create customisable images
on-demand like this one:
I use these query string parameters in a serverless function on Vercel to generate a new image for each page with the following process:
- Start up a headless chrome browser with a width of 1200px and a height of 630px.
- Navigate to
https://soorria.com/og/{title}/{subtitle}in the headless browser. This is a set of routes server-side rendered at runtime, and generates the equivalent HTML and CSS for how I want OpenGraph images too look. - Take a screenshot of the headless browser's content in the
.pngformat. - Send the image as the response. I also add the following headers to cache the
generated images for a whole year in Vercel's CDN and set the corrent
response type:
text
Cache-Control: s-maxage=31536000
Content-Type: image/png
There is one, however, pretty big downside with this process - when an image is first generated it will take a few seconds due to the serverless function's cold start, and the time required to spin up a chrome browser, load the page and take the screenshot, but this is generally mitigated by the caching implemented in step 4.
The source code for this serverless function is available
here. If you click on
the link, you may notice that it's in a different repo despite the final
og:image url pointing to a route on the soorria.com domain. The serverless
function defined in the link above is actually deployed to
https://og-gen-lovat.vercel.app/api/og and requests to
https://soorria.com/api/og are set to rewrite the image generation function in
this site's
next.config.js.
This complicated process brings up the question of why have the image generation in another repo and deployed to another site. The answer is a trade-off due to Vercel's deployment process. As mentioned in the Going Live section above, when a new version of the site is deployed Vercel wipes out the CDN cache for the previous deployment. This means that if I kept the generation in the same repo, and in the same site, any time I re-deployed all previously generated images would need to be generated again.
Link Tree?
Whoever decided to call these things Link Trees has obviously been outside
less than programmers - at least binary
trees kinda look like trees! In any case, I have a list of links available at
/links, but also at links.soorria.com. I
use Next.js' awesome
middleware feature for
this. In
middleware.ts
I rewrite any pages on select subdomains (like links.soorria.com) to the
/links page.
Wrapping Up
This blog post doesn't do justice to the mistakes I've made and lessons I've learned building this website, but overall I've had a lot of fun building this website, and I'll continue to have fun despite how over-engineered this site is.